I was taking out the recycling on a Tuesday night when it hit me.
I had a pasta sauce jar in one hand and a cardboard shipping box under my arm, and I was walking past a West Elm catalog that had arrived in the mail. On the cover: an amber glass vase for $38, a set of textured linen-colored planters for $45, some chunky cardboard bookends for $29.
I looked at the catalog. I looked at my recycling bin. I looked at the catalog again.
I was about to throw away the exact raw materials people pay $100 for at home decor stores.
That night, instead of tossing the recycling, I brought it back inside. What I made over the following weekend still lives on my shelves, coffee table, and windowsill — and every single person who sees it assumes I spent real money on it. I didn't spend a single dollar.
Here's the honest truth about budget home decor: the gap between "trash" and "high-end" is almost entirely about finish and presentation. A soup can with a beautiful texture and a matte neutral paint job doesn't look like a soup can anymore. It looks like a $30 boutique planter. The object didn't change. The finish and the intention did.
These are the six upcycle projects that have completely changed the way I look at my recycling bin — and my home.
Project 1: Glass Pasta Sauce Jars into Amber Apothecary Vases
The amber glass apothecary vase is one of the most popular home decor items on Pinterest right now. They retail for $18–$45 at Target or HomeGoods. I made mine from three empty Rao's marinara jars and a $0.99 bottle of Mod Podge I already had.
The secret is a simple DIY amber tint using Mod Podge mixed with a few drops of orange and yellow acrylic paint — colors that cost about $0.50 each from the dollar store. You coat the inside of the jar, let it cure, and the clear glass takes on a rich, warm amber tone that photographs identically to the expensive store version.
What You Need:
Clean empty glass pasta sauce jar (any size)
Mod Podge (matte or gloss)
Orange and yellow acrylic craft paint
A small mixing cup and brush
Optional: dried pampas grass, dried eucalyptus, or a simple stem to display inside
How to Do It:
Mix about 3 tablespoons of Mod Podge with 4–5 drops of orange paint and 2 drops of yellow. Adjust the ratio until you reach the amber depth you want — more orange for a deeper tone, more yellow for a honey color. Pour the mixture inside the jar, swirl it to coat all the glass, then pour out the excess and let it cure upside down on parchment paper for 24 hours.
The result is a perfectly tinted amber vase that is genuinely indistinguishable from the designer version at a glance. Style it on a shelf with a dried grass stem and it looks like a $40 decor piece. It cost you nothing.
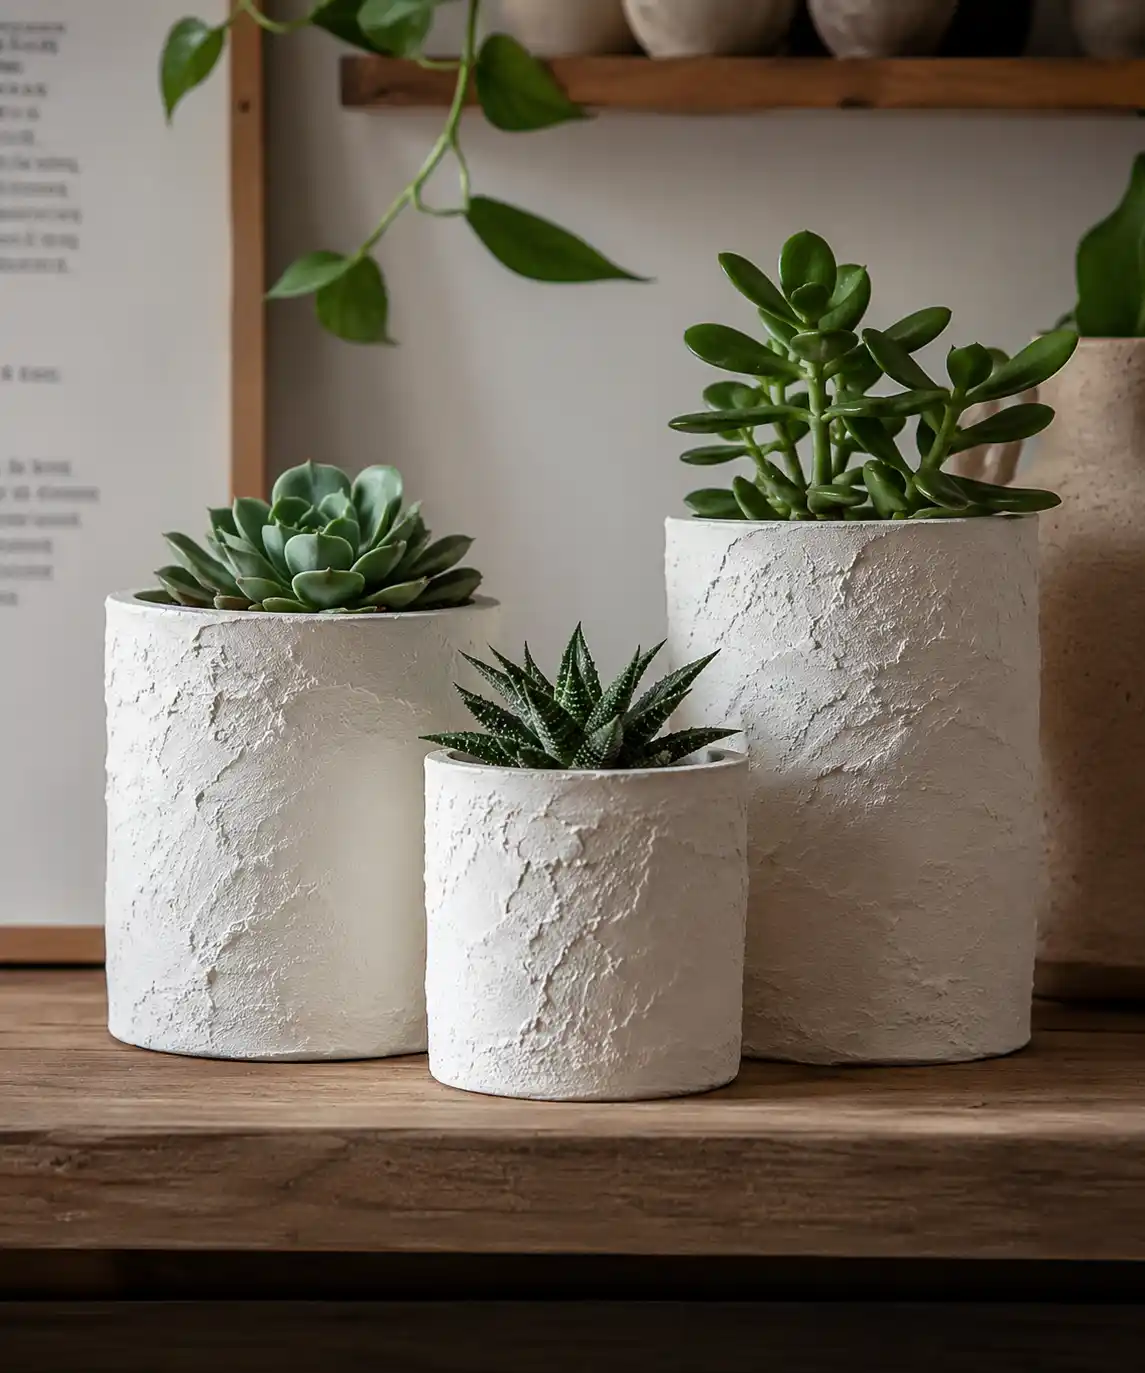
Project 2: Tin Cans into Textured Modern Planters
This is the upcycle that surprises people the most. An empty soup can, a bag of baking soda, and some craft paint — and what you end up with looks like a $28 ceramic planter from a boutique plant shop.
The texture trick is what makes this work. A thick paste of baking soda mixed with white craft paint creates a plaster-like coating that, when applied with a stiff brush or palette knife in irregular strokes, dries to a matte, rough, stone-like finish. It looks expensive, organic, and architectural.
What You Need:
Clean tin cans (soup, beans, vegetables — any size)
Baking soda
White acrylic craft paint
A stiff brush or old butter knife for texture
Optional second coat in a neutral — warm white, cream, or muted terracotta
A small nail and hammer to punch drainage holes in the bottom
How to Do It:
Mix baking soda and white paint in roughly equal parts until you get a thick, spreadable paste — the consistency of frosting. Apply it to the outside of the can in irregular, textured strokes. Don't smooth it out. The rougher and more imperfect, the better — that's what creates the plaster illusion. Let it dry completely (about 2 hours), then add a second coat if needed. Punch drainage holes in the bottom with a nail before planting.
Stack three different-sized cans together on a wooden shelf and the grouping looks like a designer planter collection. No one will ever know they held chicken noodle soup six hours ago.
Project 3: Shipping Cardboard into Faux-Plaster Arched Bookends
Arched bookends are everywhere in home decor right now and the good ones cost $35–$60 for a set. The shape is what sells them — that clean, architectural arch that looks like a tiny piece of a Moroccan doorway. And that shape is incredibly easy to replicate with thick cardboard and a little patience.
The key is to use the thickest cardboard you can find — double-walled shipping boxes work best. You layer and glue multiple pieces together to build up thickness, then sand the edges smooth and coat the whole thing in a baking-soda-paint plaster finish. The finished bookend feels surprisingly solid and heavy.
What You Need:
Thick shipping cardboard (double-walled boxes are ideal)
A pencil and scissors or craft knife
White school glue or Mod Podge for laminating layers
Baking soda + white paint mixture (same as Project 2)
A piece of felt or cork sheet for the base (prevents scratching)
How to Do It:
Draw your arch shape — a simple rectangle with a half-circle cut from the top — about 7 inches tall and 4 inches wide. Cut 8–10 identical shapes and glue them together in a stack, pressing firmly and letting each layer dry before adding the next. Once the stack is solid, sand all edges smooth with coarse sandpaper. Apply two thick coats of the baking soda plaster finish. Glue a piece of felt to the base.
The result is a bookend that has real visual weight and looks like cast plaster or concrete. Spray paint in matte white, warm cream, or even matte black for a completely different aesthetic. A pair costs absolutely nothing to make.
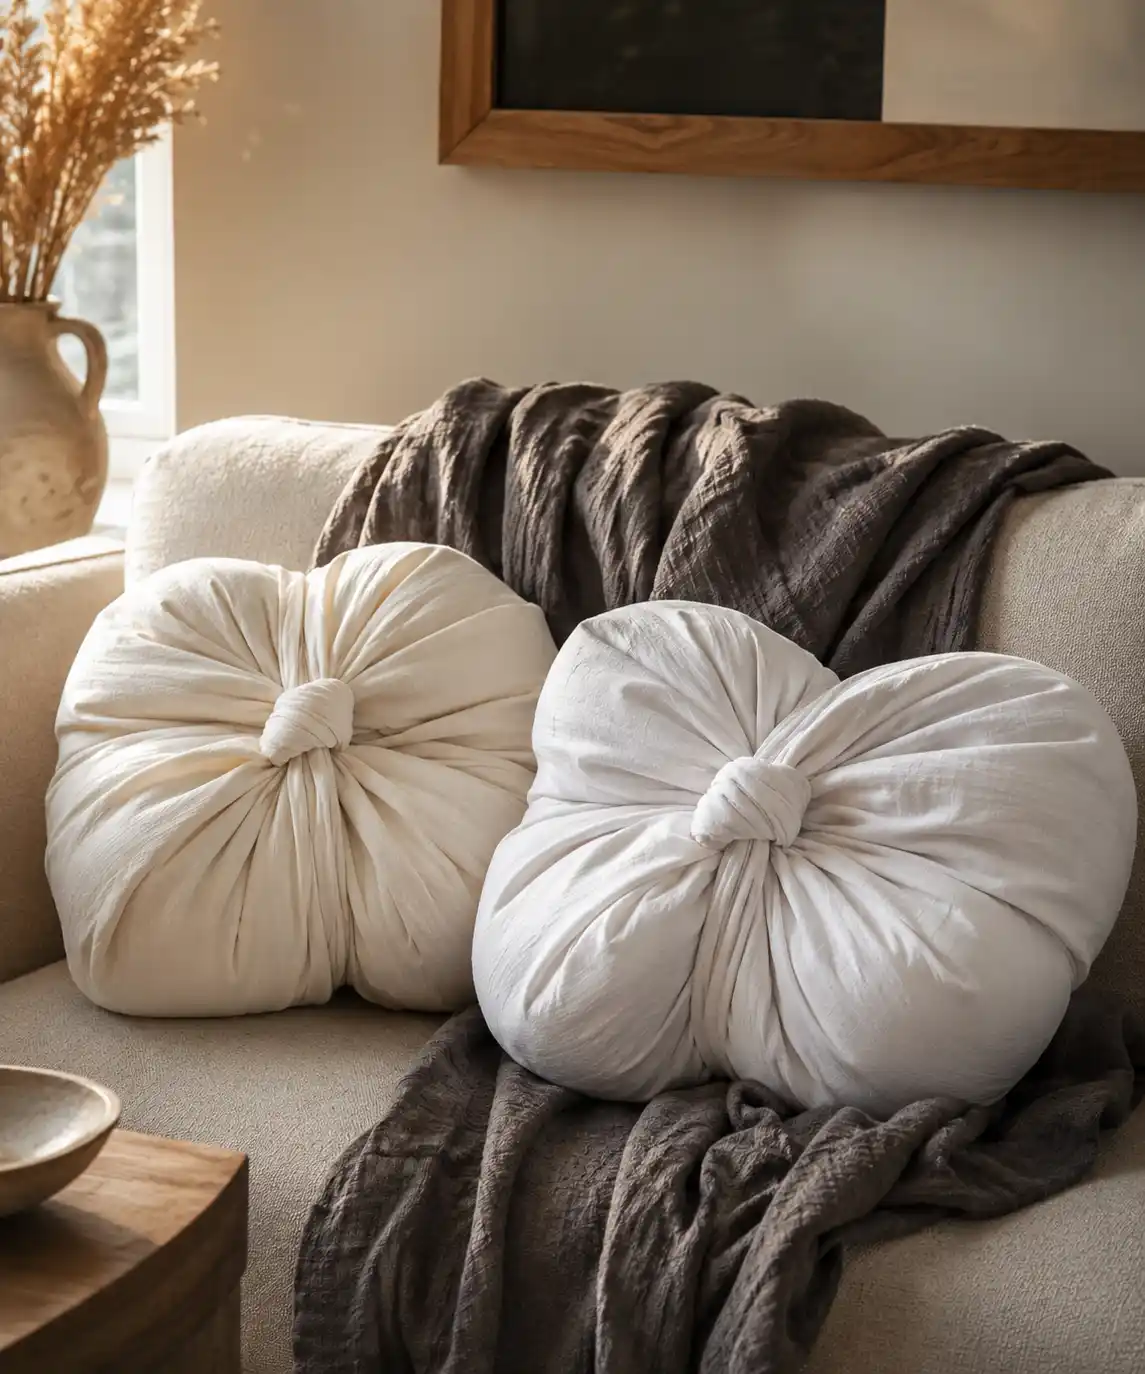
Project 4: Old Shirts and Worn Sheets into Knotted Throw Pillows
The knotted pillow trend — those big, cloud-like, relaxed-looking throw pillows that stack on couches and beds in every home decor magazine — is one of the most achievable zero-cost DIY projects I've ever tried. No sewing required. Not a single stitch.
A stained t-shirt, an old bedsheet, or even a fabric shower curtain can become a beautiful pillow with a handful of knots and some stuffing. The messier and more organic the knots, the more intentional it looks. This is genuinely forgiving DIY.
What You Need:
An old oversized t-shirt, worn bedsheet, or any large piece of fabric in a neutral color (white, cream, gray, or dusty pink work beautifully)
Pillow stuffing, an old pillow, or even crumpled plastic bags for fill
Scissors
How to Do It:
Cut your fabric into a large square — roughly 24 inches by 24 inches for a standard throw pillow. Place your stuffing in the center, gather all four corners up together over the stuffing, and tie them in a tight knot directly on top. Adjust the knot until it looks deliberate and full. Fluff the gathered fabric around the knot to create those beautiful, cloud-like folds.
For a cleaner look, cut four strips from the edges of your fabric and use them to tie off each corner separately before knotting the center. Styled on a couch, these pillows look like the $45 boho pillow covers you see at Anthropologie. They are literally made from trash.
Project 5: Wine Bottles and Olive Oil Bottles into Sculptural Vases
Before the wine bottle vase becomes a cliché, hear me out — because the way most people do it (just sticking flowers in a green bottle) is not what I'm describing. The version that looks genuinely high-end involves color, grouping, and proportion.
A cluster of three bottles — one tall, one medium, one short — all spray painted the exact same matte color creates the kind of monochromatic sculptural moment that interior designers charge consultation fees to advise. The matching color is what removes the "I just painted some bottles" look and replaces it with something that reads as intentional art.
What You Need:
3 glass bottles of varying heights (wine, olive oil, sparkling water, hot sauce — any interesting silhouette)
One can of matte spray paint in a single color (matte white, matte black, matte terracotta, or matte sage green — all look stunning)
Newspaper for spraying
Optional: a single dried stem or branch inside the tallest bottle
How to Do It:
Clean and dry all three bottles completely. Spray two thin coats of matte paint on the outside, letting each coat dry 20 minutes before adding the next. The matte finish is critical — gloss looks cheap, matte looks sculptural. Arrange the three bottles in a cluster on a shelf, windowsill, or coffee table corner. Add one tall dried stem in the largest bottle for height variation.
The monochromatic grouping of three is a basic design principle that makes any collection of objects look curated and intentional. These cost whatever the spray paint costs divided by the ten or fifteen projects you'll use one can for. Essentially free.
[Img Needed] - A minimal, striking photo of three matte white spray-painted bottles of varying heights clustered together on a light marble surface — one with a single dried pampas grass stem — clean, modern, beautiful, and immediately recognizable as something you'd see for $60 at CB2.
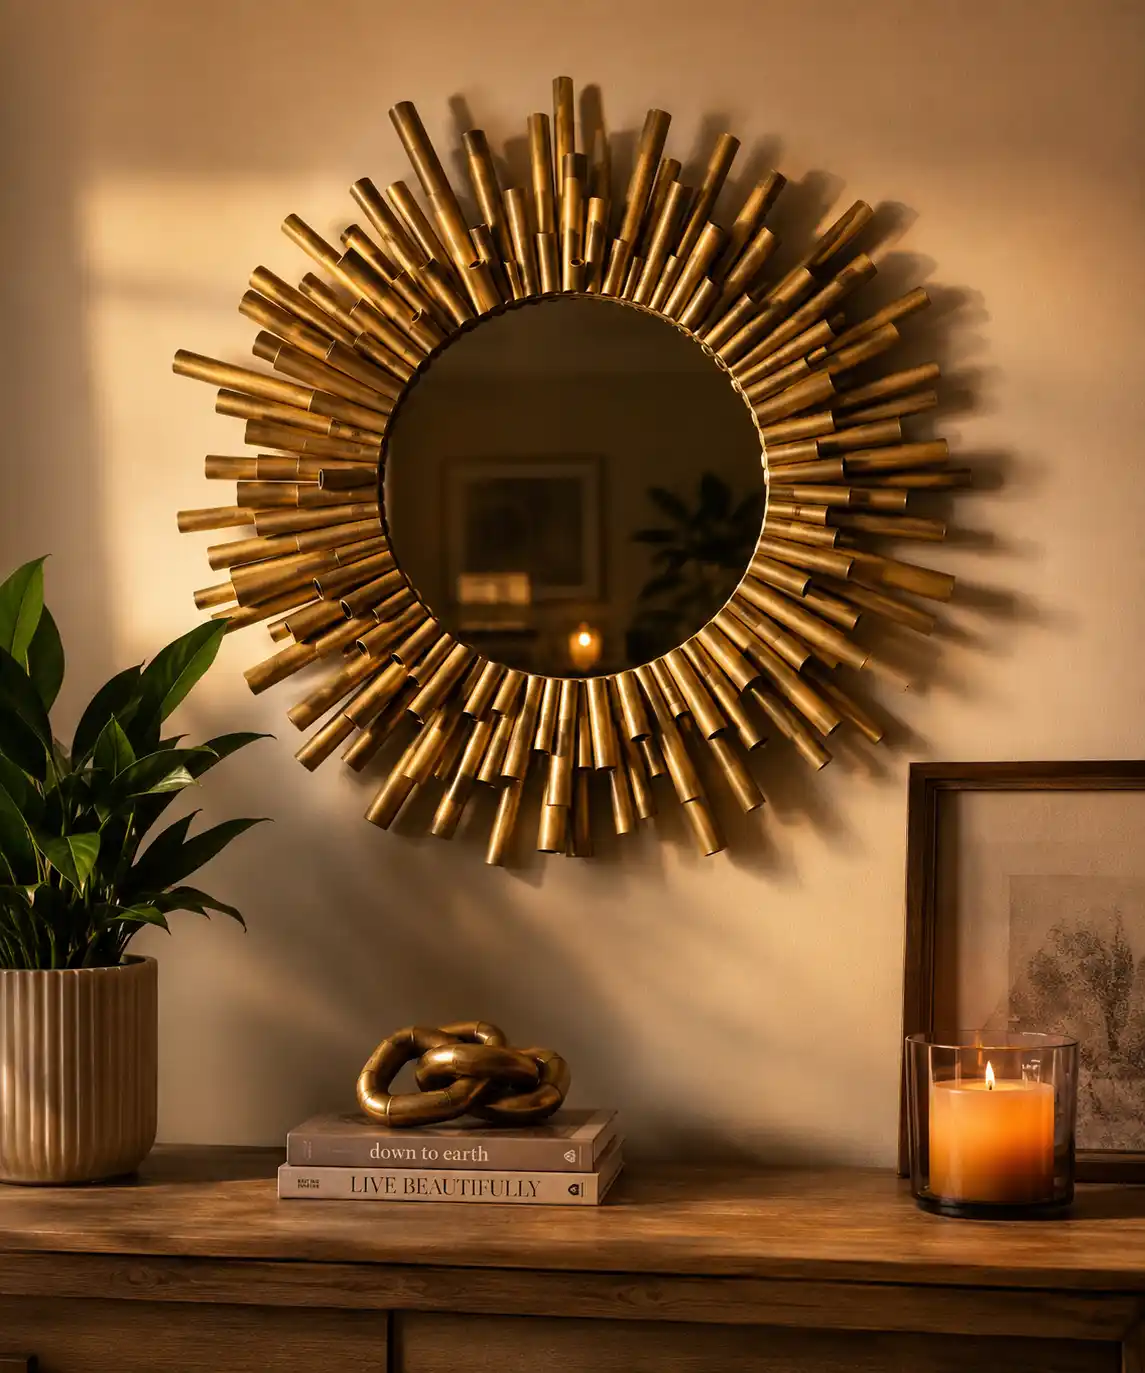
Project 6: Stained Cardboard Tubes into a Statement Wall Mirror Frame
Toilet paper tubes and paper towel tubes are one of the most dismissed pieces of household recycling. They're also incredibly rigid, uniformly shaped, and easy to cut, glue, and paint — which makes them ideal for building a decorative frame around a plain dollar store mirror.
This project takes a bit more time than the others — maybe two hours of assembly — but the result is the most dramatically beautiful thing in my apartment right now. A sunburst mirror frame made from painted cardboard tubes looks architectural, modern, and 100% intentional.
What You Need:
20–30 paper towel or toilet paper tubes
A flat dollar store mirror or an old mirror you already own
Hot glue gun and glue sticks
Matte spray paint (gold, black, or white all look stunning)
Strong craft glue or Gorilla Glue for attaching the frame to the mirror edge
How to Do It:
Cut your tubes into varying lengths — some short, some long, some at angles. Spray paint all of them the same color and let them dry completely. Starting from the edge of the mirror, hot glue the tubes outward in a radiating sunburst pattern, mixing lengths and angles to create organic variation. Once the full frame is assembled, do a final light spray coat to unify any visible glue spots.
Hang it on the wall and it looks like a $120 artisan mirror. It's made from toilet paper tubes. The gap between those two statements is entirely about intention, finish, and confidence — and this project has all three.
Creativity Is the Ultimate Budget Hack
Here's what all six of these projects have in common beyond the zero-dollar price tag: they all required me to look at something I was about to throw away and ask what could this become? That shift in perspective — from trash to raw material — is genuinely one of the most valuable and sustainable habits I've built.
The most beautiful, characterful homes I've ever walked into were rarely filled with things bought new at retail. They were filled with things with stories — found objects, made things, repurposed pieces that took creativity and intention to become what they are.
You have everything you need already. It's probably sitting in your recycling bin right now.
So tell me — what's the first thing you're going to pull out of your recycling bin to upcycle this week? Is it the glass jar, the tin cans, the cardboard box? Drop it in the comments — I genuinely want to know what you make, and if you share a photo somewhere, come back and tell me. You're going to surprise yourself.
Loved this post? Save it to your DIY or Home Decor board on Pinterest — and share it with a creative friend who would genuinely enjoy a good upcycling challenge.


Reader Interactions